Enter Google Sites, (http://sites.google.com) a free service that allows anyone with a Google login to quickly generate a useful and handsome site for free.
Creating a new site with Google Sites is very easy. If you’ve used any of the other Google Apps - or even just iGoogle, you’ll likely feel right at home with the control and menu schemes found here.
You can start out by creating a front page for your site (class website, project website, etc.) and from there decide whether to add more standard pages or utilize Google other built-in page types which include:
Dashboard - a page that is broken down into sections, where a wide variety of embedded web elements can be added.
Announcements - a page that allows you to leave quick blurbs — great to use as a blogging tool.
File Cabinet - a page that will create a list of files you upload.
List - a page where you can easily create customized lists.
These page types are just the beginning and more will be added as the service grows.
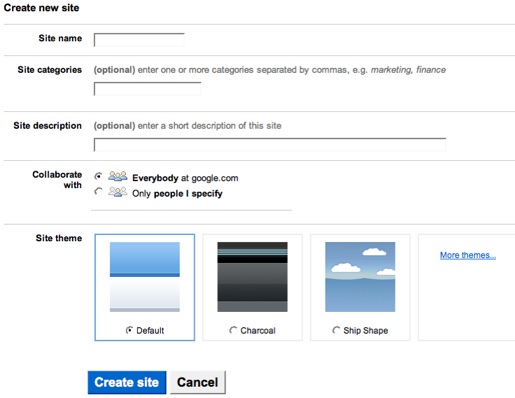
To start your site, click "Create New Site" You will see the page below. Insert "Site Name" This will become part of the url (website address) for your website. Make sure the name is accepted. Fill in the remainder of the form and click "Create Site". You will also have to fill in the code word box.
Below: The site creation page with some default theme options.
All sites can be set to be either public or private, with the same option given to set who can edit pages.
Once you complete the form, you are ready to start your site.
To create your website, Click "create new page"

Insert Page Name

At next screen choose "Web Page"

And click "Create Page"
At next screen Click "Edit page" to begin your content. The formatting features look very similar to Word. The major
tabs you will use will be "Insert" to insert an image; table to insert an table and Layout to choose the number of columns.
The tabs are self explanatory.
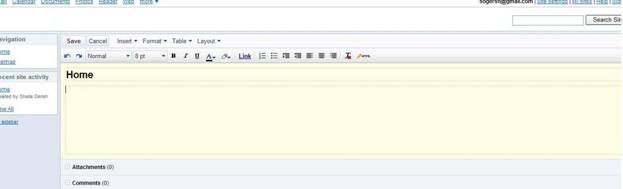
Click in to the main body area of the
page and begin typing. You can add images, links and text in a
variety of formats.
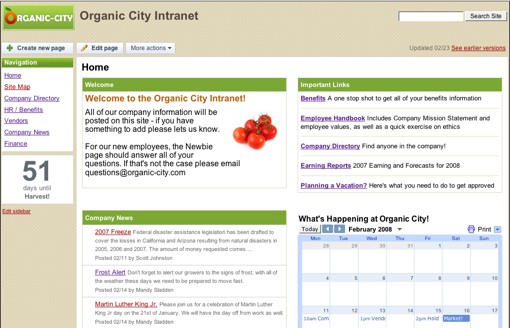
Below: An example of an intranet site created with Google Sites.
In terms of storage space on the “cloud,” Google Sites will use the same 10 gigabytes of storage that is shared by all Google applications on the free ’standard’ and ‘team’ packages.
Uploading Pictures
This is quite straight forward.
-
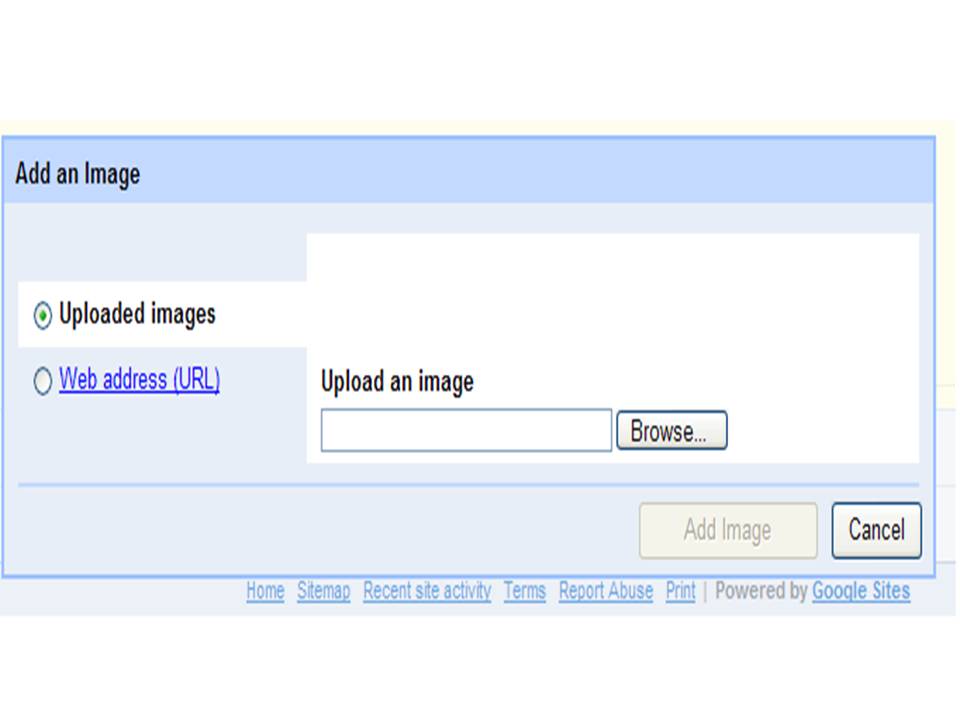
Make sure your cursor is somewhere in
the main window (preferrably where you want the image to be).
-
Then, simply Click "Insert"; then click "Insert and click "Uploaded images" to select
an image by either browsing on your local computer or choosing one that is already in your SITES folder. Once you have identified the image, click the "Add Image" button.
-
Once the pictures is one your page, if you click the picture, you can do some editing for size and alignment.
Formatting
Text
Headings
When entering text, you have 4 options for
whether the text is a heading or just normal text. To switch between
them you simply click the required heading type from the lower left
hand menu. Generally you will want to be in normal text mode.
Heading Types
Tip - once you have added a heading, press
enter to go to a new line, and then switch the heading type back
to normal text to continue writing.
Text Alignment
You have 3 options for text alignment;
left, center and right aligned. This is pretty self-explanatory,
but for those of you who have never used a word processor before:
This text is left aligned
This text is
center aligned
This text is right
aligned
Font Families
At this time, there are 7 font
types to choose from. This is the default normal font.
Font Sizes
Other Text Options
There are also options
for bold and italics as well as a colour pallete with 70
different colours to choose from.
Creating Links
Adding links in SITES is easy There are 2 types of links as you can
see from the following screen shot. In order to link, you must highlight a word on the page where you want to create the link. If you want to link to a web page you already created in SITES, Click "Existing Page" to link to another page in your website. The pages that you already created will appear. Click the one you want to link to. If you want to link to a website address (url), highlight the word, click link and then click "Web address". Type the url (website address) in the box. and click OK.

-
You can switch
the layout of the site to one, two, or three columns.
-
You can change
the look of the site by selecting a different template. This page
is currently using the default template, but at the time of writing
there were 41 templates to choose from.
Conclusion
This is another great
tool by Google,
Uploading images
and files is easy, as is the text formatting tools. All in all,
you can create a decent web page in less than one hour including
taking and uploading all the images.
Anyone who can use
a word processor confidently should find building pages with Google
Page Creator easy, so the test for now is to see if I can
get others tostart creating pages of their own.

